Digital Product Launch Checklist: What to Check Before You Go Live

A digital product can be finished but still not be ready to sell. Before you publish the sales page or send people to checkout, run through the buying experience from the customer’s point of view.
This checklist focuses on the practical things you can verify before going live.
Digital Product Launch Checklist: What to Check Before You Go Live
Do not treat launch readiness as one final “Is everything done?” question. Break it into smaller checks: product, offer, page, payment, delivery, email, mobile experience, tracking, and support.
Your goal is not to make the launch perfect. It is to find avoidable problems before customers find them for you.
Digital Product Launch Checklist: What to Check Before You Go Live First
Start with the product itself. Marketing cannot fix a missing file, broken download, unclear instruction, or deliverable that does not match what the sales page promises.
1. Confirm the Final Product Files
- Open the exact files customers will receive.
- Remove draft, test, internal, or outdated versions.
- Check that file names are understandable.
- Confirm all included files open correctly.
- Check links inside PDFs, documents, templates, or guides.
- Make sure the package contains what your product page says it contains.
If the product includes several files, download and open the final ZIP or package rather than checking only the source folder on your computer.
2. Check the Product From a New Customer’s Perspective
You already know how the product works. A new buyer does not.
Ask:
- Is it obvious which file to open first?
- Are setup or usage instructions needed?
- Does the customer need an account, software, app, or particular file format?
- Are important requirements explained before purchase?
- Is there a clear place to get help?
For a product with several components, a short Start Here file can make the package easier to understand.
3. Confirm Exactly What the Buyer Gets
Write a plain list of deliverables and compare it with the actual package.
| Sales Page Says | Customer Actually Receives | Match? |
|---|---|---|
| Main guide | Final PDF guide | Check |
| Worksheet | Worksheet file | Check |
| Bonus template | Template/access link | Check |
This simple comparison can catch an outdated bonus, renamed file, or missing component before launch.
4. Review the Offer in One Sentence
You should be able to explain:
Who It Is For → What They Get → What It Helps Them Do
If that is difficult, the product page may also be difficult to understand.
Avoid expanding the promise just to make the launch sound bigger. The offer should reflect what the product can reasonably help the buyer accomplish.
5. Confirm the Price Everywhere
Check every place where the price appears:
- sales page;
- pricing section;
- checkout;
- launch email;
- social graphics;
- coupon or promotional copy;
- FAQ where relevant.
If you changed the price during preparation, search for the old number before launch.
6. Check Currency, Taxes, and Payment Information
Make sure the checkout displays the intended currency and that the payment configuration matches your actual business setup.
Tax, invoicing, consumer-law, and payment requirements vary by business and jurisdiction, so this checklist cannot determine what legally applies to you. Verify applicable requirements for your situation rather than copying another seller’s setup.
7. Read the Sales Page Without Editing It
Switch from writing mode to customer mode.
Read the published or preview page from top to bottom and check whether it clearly answers:
- What is this?
- Who is it for?
- What is included?
- What problem does it address?
- How is it delivered?
- How much does it cost?
- What should I do next?
Do not spend this review only changing fonts and colors. Look for missing information, contradictions, and unclear calls to action.
8. Click Every Important Button and Link
Test the actual links a customer may use:
- Buy Now buttons;
- checkout links;
- FAQ links;
- terms or policy links;
- contact/support links;
- login or access links;
- download links where appropriate.
A button can look correct while pointing to an old checkout, test page, or wrong product.
9. Test the Checkout Separately
Checkout deserves its own test because it sits between interest and purchase.
Verify the intended product, price, currency, payment options, required fields, coupon behaviour if used, confirmation step, and what happens immediately after payment.
If you need a deeper checkout-only process, use your separate checkout testing checklist rather than turning this launch checklist into a duplicate of it.
10. Test What Happens Immediately After Payment
Do not stop the test when payment succeeds.
Check where the buyer goes next:
- thank-you page;
- download page;
- account area;
- course access;
- confirmation email;
- another delivery method used by your setup.
The customer should not have to guess where the purchase went.
11. Verify Digital Delivery
Use an appropriate test order or test workflow and experience the delivery as a buyer.
Check:
- the correct product is delivered;
- the download or access link works;
- the link goes to the intended version;
- instructions are understandable;
- access permissions are correct;
- the buyer can identify what to do next.
If delivery depends on email, also check whether the buyer has another reasonable way to understand what happened if they do not immediately see the message.
12. Review Transactional and Welcome Emails
Open the actual emails used after purchase.
Check the sender name, subject, links, product name, instructions, support information, and any dynamic fields.
Remove placeholder text and references to old products or previous tests.
13. Check the Mobile Buying Experience
Open the public page on a real phone where possible.
Look for:
- headline wrapping problems;
- text that is difficult to read;
- buttons that are hard to tap;
- images that overflow or become too small;
- pricing that is hidden or confusing;
- forms that are awkward to complete;
- popups that block important content.
Then continue far enough through the buying path to make sure the next steps are also usable on mobile.
14. Check the Page on Desktop Too
A mobile check does not replace a desktop check.
Review spacing, image quality, navigation, buttons, forms, and any layout elements that change at larger screen sizes.
You do not need to test every device in existence. Focus on the main experiences your audience is likely to use and fix obvious breakage.
15. Review Your Product Images and Preview
Product visuals should help a potential buyer understand the offer.
Check that:
- the main image represents the current product;
- old covers or screenshots have been removed;
- preview text is readable where it needs to be;
- mockups do not imply items that are not included;
- image quality is acceptable on the live page.
16. Prepare the Essential Support Path
Decide where a buyer should go if something goes wrong.
Examples include a support email, contact form, help page, or account support area.
Make the support route easy enough to find. You do not need a large help desk for a small product, but the customer should not have to search your entire website for a way to contact you.
17. Review Refund, Terms, Privacy, and Other Relevant Policies
Check that the policies relevant to your business and sales process are available and consistent with the current offer.
Do not copy policy wording from another website and assume it applies to you. Legal requirements vary by location, product, business model, payment method, and customer location.
If you are unsure about your obligations, get appropriate professional guidance for your situation.
18. Decide What You Will Measure
You do not need a large analytics dashboard before launch, but decide which information will help you evaluate what happened.
Depending on your setup, that may include:
- visits to the product page;
- checkout starts;
- completed purchases;
- traffic source;
- email clicks;
- refunds or support issues;
- questions people ask before buying.
Only collect metrics you have a reason to review.
19. Verify Tracking Before You Need the Data
If you use analytics, pixels, conversion events, or tagged campaign links, check the implementation before launch traffic arrives.
Do not assume a script is working merely because it was installed previously. Configuration can change when pages, domains, checkout systems, or consent settings change.
20. Prepare the Main Launch Message
Write the message that tells people the product is available.
It should make the next step obvious:
Problem/Need → Product → Relevant Benefit → Clear Link or CTA
You can adapt the message for email, social media, a community, or another channel rather than inventing completely different positioning everywhere.
21. Prepare More Than One Way to Explain the Product
A launch does not need dozens of posts, but one announcement may not answer every question.
Prepare a few useful angles, such as:
- the problem the product addresses;
- what is included;
- how it works;
- who it is for and who it is not for;
- a useful tip related to the problem;
- an FAQ or objection you can answer accurately.
This gives you material to communicate the offer without repeating the same sentence.
22. Check Every Scheduled Email or Post
If you schedule launch content, verify:
- date and time;
- time zone where relevant;
- product name;
- price or promotion;
- destination URL;
- coupon code;
- images;
- CTA wording.
A perfectly written scheduled message is still a problem if it points to a page that is not ready.
23. Decide What Happens When Someone Asks a Question
Before launch, list the questions you can already anticipate.
For example:
- What format is the product?
- How do I access it?
- Is specific software required?
- Can I use it on mobile?
- Is this a one-time payment or subscription?
- What exactly is included?
Put important answers on the product page or FAQ where appropriate, and keep support answers ready for questions that still arise.
24. Create a Simple Launch-Day Check
On launch day, do a short live check before sending significant traffic.
- Open the live sales page.
- Confirm the intended offer and price.
- Click the primary CTA.
- Confirm checkout is reachable.
- Check the main delivery path.
- Confirm support contact information is available.
- Check scheduled or launch-day links.
This is a final sanity check, not a substitute for testing beforehand.
25. Decide What Would Make You Pause the Launch
Some problems are cosmetic. Others directly affect the ability to buy or receive the product.
Consider pausing promotion if you discover a material issue such as:
- checkout cannot complete;
- the wrong price is being charged;
- buyers receive the wrong product;
- delivery is unavailable;
- a critical sales-page claim is incorrect;
- an important requirement was omitted and could materially mislead buyers.
Having a simple pause/fix/retest process can be more useful than trying to improvise while launch messages are already going out.
26. Plan a Short Post-Launch Review
Launch preparation should include a time to review what happened after the product goes live.
Look at:
- what worked as expected;
- where customers became confused;
- which questions appeared repeatedly;
- whether delivery or access problems occurred;
- which page or email needs clarification;
- which data is useful enough to keep tracking.
The purpose is not to declare the entire product a success or failure from one metric. Use what you learned to improve the next version of the page, product, delivery process, or launch.
Final Pre-Launch Checklist
- Final customer files are correct and open successfully.
- The product package matches the stated deliverables.
- The offer is clear and does not overpromise.
- Price and currency are consistent.
- Sales-page buttons and important links work.
- Checkout has been tested.
- Post-payment delivery has been tested.
- Customer emails contain the correct information.
- Mobile and desktop experiences have been reviewed.
- Current product images and previews are being used.
- A support route is available.
- Relevant policies have been reviewed for the current offer.
- Important tracking has been checked.
- Launch links and scheduled messages are correct.
- You know what would cause you to pause and fix the launch.
- A post-launch review is planned.
Final Takeaway
A useful launch checklist is less about adding more marketing tasks and more about checking the complete customer path: understand the offer, buy the correct product, receive it, use it, and know where to get help.
You can manage these checks with separate tools if that suits your setup. If you later want one platform for landing pages, checkout, email campaigns, and automation, Systeme.io is one option to explore for bringing more of that launch workflow together.
Suggested Articles to Read
 Want to Sell an Online Course Without Building a Website?
 Want to Sell an Online Course? Here’s the System You Actually Need
 Systeme.io vs WooCommerce: Which Is Simpler for Selling One Digital Product?
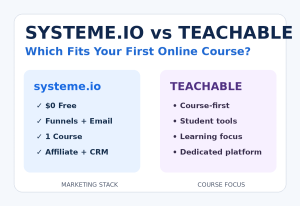 Systeme.io vs Teachable: Which Is Better for Selling Your First Online Course?
 Systeme.io Review: Is It Worth It for Beginners in 2026?