How to Create a Welcome Email Sequence
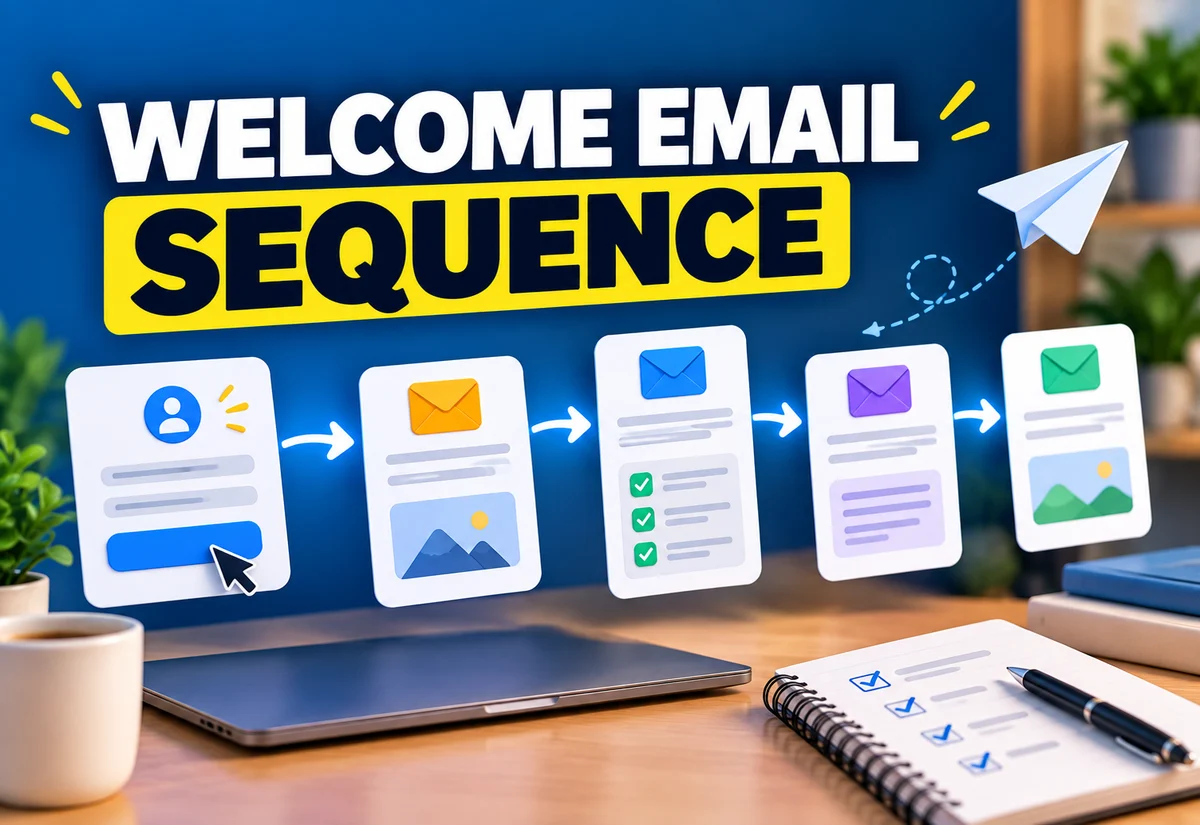
Getting someone onto your email list is only the beginning. After subscribing, a new reader may need the resource they requested, an explanation of what you send, useful context about your business, and a clear next step.
A welcome email sequence lets you deliver those messages automatically instead of trying to fit everything into one long welcome email. The sequence does not need to follow a universal number of emails or a rigid schedule. It needs a clear purpose for each message.
A useful welcome sequence answers four questions for a new subscriber: Did I get what I signed up for? Who is sending these emails? What will I receive next? What should I do now?
How to Create a Welcome Email Sequence
Start with the reason someone joined your list. A person who downloaded a checklist has different expectations from someone who joined a product waitlist, registered for a webinar, or subscribed to a general newsletter.
Write down the promise made on the signup form. Your first email should fulfil or confirm that promise. The remaining emails can then help the subscriber understand your content, solve a related problem, discover useful resources, or take a relevant next action.
A simple planning flow looks like this:
Signup → Deliver Promise → Set Expectations → Provide Value → Guide Next Step
How to Create a Welcome Email Sequence Without Overcomplicating It
Give every email one primary job. If a message is simultaneously trying to deliver a lead magnet, tell your full company story, promote three products, request a survey, and send readers to five social channels, the next action can become unclear.
Instead, separate the jobs that genuinely matter. You can always expand the sequence later when subscriber behaviour shows that another message or branch would be useful.
1. Decide What the Subscriber Signed Up For
The signup source should shape the sequence.
For example:
- A lead magnet subscriber expects access to the promised resource.
- A newsletter subscriber needs to know what kind of emails to expect.
- A waitlist subscriber may need updates about the upcoming product or launch.
- A webinar registrant needs event information and relevant reminders.
- A new customer may need onboarding rather than a marketing-focused welcome sequence.
This distinction matters because “new subscriber” is not always a complete description of intent. Two people can enter the same email platform for very different reasons.
2. Choose One Main Goal for the Sequence
Your welcome sequence can support several outcomes, but choose one main direction before writing.
Possible goals include helping subscribers consume a lead magnet, introducing your best educational content, learning what topics they care about, preparing them for a relevant offer, or helping them take the first step with a product or service.
The goal determines which emails deserve a place in the sequence. If an email does not help the subscriber or move the sequence toward its purpose, consider removing it.
3. Plan the First Welcome Email
The first email should match what the subscriber expects immediately after signup. If you promised a downloadable resource, access link, coupon, registration information, or another benefit, make that easy to find.
A practical first email can contain:
- a clear welcome;
- the promised resource or confirmation;
- a brief reminder of why they are receiving the email;
- a short introduction to the sender;
- what they can expect next;
- one obvious next action.
Avoid hiding the promised item below a long introduction. The subscriber completed the signup action for a reason; fulfil that expectation before asking for additional attention.
4. Decide What the Next Emails Need to Accomplish
There is no fixed number of emails that every welcome sequence needs. MailerLite’s current guidance says the exact messages depend on campaign goals and target audience, while its examples use different sequence structures for different situations.
Instead of starting with a number, list the jobs the sequence needs to perform.
| Email Job | Possible Content |
|---|---|
| Deliver | Provide the promised resource, access, discount, or confirmation. |
| Orient | Explain what subscribers can expect and where to start. |
| Help | Teach one useful idea related to why they subscribed. |
| Discover | Ask about interests or point to preference options where appropriate. |
| Guide | Recommend one relevant resource, product, service, or next action. |
You may combine some of these jobs when the message remains clear. A simple newsletter may need fewer steps than a business with several audience segments and offers.
5. Create a Simple Welcome Sequence Framework
If you are starting from scratch, use a framework rather than treating it as a mandatory template.
Email 1: Deliver and confirm
Welcome the subscriber and fulfil the signup promise. If they requested a lead magnet, make the download obvious. Tell them briefly what to expect from you.
Email 2: Provide a useful next step
Help the subscriber make progress on the same problem that caused them to join. This might be a short tip, a beginner resource, a common mistake to avoid, or a practical action.
Email 3: Add context and direction
Introduce the part of your business, content library, or expertise that is relevant to this subscriber. You can also invite them to indicate their interests when your email platform and strategy support preference-based segmentation.
Email 4: Present a logical next action
The next action could be another guide, a reply, a product page, a consultation, a course, or an offer. It should follow naturally from the reason the person subscribed rather than appearing simply because the automation reached its final email.
This four-job framework can become fewer or more messages. The useful unit is the job each email performs, not the number itself.
6. Choose Timing Based on Expectations
The first email should be triggered when the subscriber completes the relevant signup or confirmation step, particularly when they are waiting for something you promised. Both MailerLite and Mailchimp describe welcome sequences as beginning when someone joins or signs up.
After that, spacing depends on what the subscriber needs. A time-sensitive event sequence may need a different schedule from an evergreen newsletter welcome sequence.
Ask:
- Does the subscriber need this information before taking another step?
- Would another email immediately add value or create unnecessary repetition?
- Is there a deadline, event date, trial period, or other genuine timing constraint?
- Will the subscriber also receive regular broadcasts during the sequence?
Use those answers to set delays rather than copying a schedule that was designed for another business.
7. Keep Each Email Focused on One Primary Action
An email can contain several links, but the reader should still understand the main thing you want them to do.
If Email 1 exists to deliver a guide, make the guide easy to access. If Email 2 teaches a useful concept, the primary action might be reading a related tutorial. If Email 3 asks about preferences, make that choice clear.
This also makes the sequence easier to evaluate. When an email has one defined job, you can ask whether it is actually helping subscribers complete that job.
8. Connect the Sequence to the Correct Trigger
Email automation starts with a trigger. Depending on your email marketing software, this might be joining a group, completing a form, receiving a tag, making a purchase, or another supported event.
MailerLite’s current welcome-series example, for instance, demonstrates a workflow triggered when a subscriber joins a designated group.
Whatever platform you use, verify that the trigger matches the intended audience. A general newsletter subscriber should not accidentally receive a customer onboarding sequence, and an existing customer should not necessarily receive the same introduction as a new lead.
9. Decide Whether You Need Segmentation
You do not need a complex branching workflow on day one. Segmentation becomes useful when knowing something about the subscriber would materially change what you send.
For example, a business serving freelancers and agencies might ask subscribers which description fits them. Future emails could then point to resources relevant to that choice.
MailerLite’s welcome automation examples include preference collection and conditional paths based on subscriber activity, illustrating how a basic sequence can later become more targeted.
Only add a branch when you know what different message each group should receive. Collecting information that never changes the subscriber experience creates extra complexity without a clear benefit.
10. Write the Emails Before Building the Automation
Planning the sequence outside the automation builder can make the logic easier to review.
- Write the signup promise at the top of the plan.
- Define the main goal of the sequence.
- Give each email one job.
- Write the subject and body for each message.
- Choose the primary action for each email.
- Decide the order and delays.
- Identify any conditions or branches you genuinely need.
- Then build the workflow in your email platform.
This separates content decisions from software configuration and makes it easier to spot repeated messages or missing steps.
11. Test the Welcome Email Sequence Before Activating It
Do not assume the automation works because the workflow diagram looks correct.
Run through the subscriber experience yourself using an appropriate test address. Check:
- the correct trigger starts the sequence;
- the first email arrives as expected;
- download and resource links work;
- personalization fields do not display broken fallback text;
- delays and message order are correct;
- buttons work on mobile;
- the sender name and reply address are correct;
- unsubscribe and required footer information are present;
- conditions send test contacts down the intended path.
If the sequence includes a purchase, form submission, tag, or integration, test that event as well rather than testing only the email design.
12. Do Not Confuse a Welcome Sequence With Your Regular Newsletter
A welcome sequence is triggered by an individual subscriber action. A regular newsletter or broadcast is generally sent according to your ongoing publishing or campaign schedule.
New subscribers may receive both, depending on your setup. That makes coordination important. If a subscriber receives several automated messages plus frequent broadcasts at the same time, the experience may feel very different from what you planned when viewing each campaign separately.
Review the combined experience, not only the welcome automation in isolation.
Common Welcome Sequence Mistakes
- Failing to deliver the signup promise clearly. The first message should not make subscribers hunt for what they requested.
- Making every email a sales email. A sequence can include an offer, but each message should have a reason to exist.
- Using the same sequence for unrelated signup intents. A webinar registrant and a lead-magnet subscriber may need different information.
- Adding too many branches too early. Start with the logic you can explain and maintain.
- Forgetting the transition after the sequence. Decide what subscribers receive once the automation ends.
- Never testing changes. Editing a form, group, tag, field, or integration can affect how contacts enter or move through the workflow.
What Software Do You Need?
You need an email marketing platform that supports the automation required by your sequence. The exact feature set depends on how advanced the workflow is.
For a basic sequence, look for the ability to capture subscribers, trigger an automation, send scheduled emails, and manage unsubscribe preferences. More advanced workflows may need groups, tags, custom fields, conditions, branching, or integrations.
MailerLite is one example of a platform with welcome automation workflows, including triggers, delays and conditional paths in its current documentation. Other email marketing and all-in-one platforms provide their own workflow models, so compare the capabilities you actually need rather than choosing by feature count alone.
Welcome Email Sequence Checklist
- The signup promise is clearly defined.
- The first email fulfils or confirms that promise.
- The sequence has one main goal.
- Every email has a useful job.
- Each message has a clear primary action.
- The trigger sends the correct subscribers into the workflow.
- Delays fit the subscriber’s situation.
- Branches exist only where they change the experience.
- The full sequence has been tested.
- You know what subscribers receive after the sequence ends.
Final Takeaway
To create a welcome email sequence, begin with the promise that caused someone to subscribe. Deliver that promise first, then use the remaining messages to set expectations, provide useful help, learn relevant preferences where needed, and guide the subscriber toward a logical next action.
Do not start by deciding that every business needs a particular number of emails. Start with the jobs the sequence must perform. Once the basic path is useful and tested, you can improve it with segmentation, additional content, or automation rules when those additions solve a real need.
Suggested Articles to Read
 How to Segment Your Email List Without Creating Multiple Lists
 How to Follow Up With Leads Without Sending Emails Manually
 15 Spreadsheet Products You Can Create and Sell to Small Businesses
 How to Automatically Add New Leads From a Landing Page to Your Sales Pipeline
 Want to Sell an Online Course Without Building a Website?